(This is a continuation of my thoughts about a mapless Medieval campaign supporting tactical medieval rules, such as Chainmail. This is the first version of the random generation of lands and troops.)
The Player represents the Lord of a Manor, which owns a Demesne. At the center, of course, is his Manor, or Castle. This provides two military units, A unit of Crossbows (light infantry, 18 figures, crossbow), and a unit of Knights (heavy horse, 9 figures, with lance).

So, if we go with this chart for the random determination of lands:
2 - Vineyard
3 - Port
4 - Town
5 - Freeland
6 - Forest
7 - Farm
8 - Pasture
9 - Church
10 - Highlands
11 - Fish Ponds
12 - Orchards
Then the next step is to determine what a Lord will receive for his feudal escheats from each of those types of land.
Vineyard - Lands with grape vines, plus wine presses, cellars, and a local population of workers to draw from. The wine is a valuable trade item, so this land produces not only feudal soldiers (heavy infantry) but also money, from the wine trade. Provides a unit of Spearmen (heavy infantry, 18 figures), and 100 bezants.

Port - This land is along a navigable river, and a trading town has been built up at the spot of a natural mooring spot on the river. Some money is produced from the trade port, but more importantly, the ability to hire foreign mercenaries is possible, due to the amount of seagoing traffic that comes through here. Provides 200 bezants. May hire foreign mercenaries.

Town - A sizeable independent town has grown up here, meaning that it supports not only a sizeable market (large enough to service the town, but also the surrounding lands and villages), but also a church, guildhalls, mills and other urban services. The feudal obligation of the town is met through providing troops drawn from the town population, and the marketplace generates a regular flow of tax money. Provides a unit of Billmen (heavy infantry, 18 figures, polearms), and 100 bezants.

Farm - This is not just a single farm, but farmland representing multiple hides worth of feudal farms and subtenants. The feudal obligation of all these farms and villages is met in the form of heavy infantry, but also the natural horsemanship of the population means that some mounted soldiers can be classed as sergeants. Provides either Spearmen (heavy infantry, 18 figures), or Sergeants (medium horse, 9 figures).

Forest - Representing the waste of the demesne, the woodlands provide the serfs with the means of producing charcoal, harvesting firewood, and hunting for small game. Of course, there are enough villeins and scoundrels lurking along forest roads that a ready supply of archers can be conscripted. Depending on the area around the forest, it is also possible that some mounted archers can be found, and could be formed into units of hobilars. Provides either Archers (light infantry, 12 figures, longbow), or Hobilars (medium horse, 9 figures, bow).

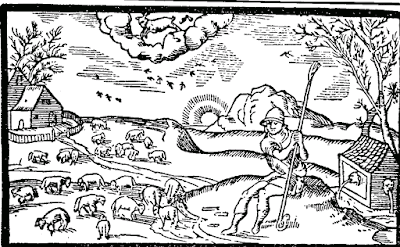
Pasture - This represents closed lands for the Lord's private flocks of animals. Open land is found in the farm lands for the serfs to graze their own animals, this is representing husbandry of animals on a large scale. Local villages supporting the economy of shepherds and drovers will produce feudal troops suitable for light cavalry duty, or as slingers. There is also some money to be made from the wool trade. Provides either Slingers (light infantry, 12 figures, sling), or Riders (light horse, 9 figures), and 100 bezants.
Highlands - These lands are in hills and mountains with terrain typically too rough for large scale farming or grazing. The locals are rough independent clans and tribes, that owe fealty but may not provide much for the manor other than occasional military service. The troops are irregular bands that are useful for scouting and skirmishing, best described as light infantry or mounted raiders. Provides Highland Infantry (light infantry, 18 figures, Pike; or 12 figures, Bow), or Reivers (medium horse, 9 figures, lance).

Orchards - Lands given over to long term agricultural produce, such as fruit and nut trees. Typically such lands are a sign of a successful Manor, and so the presence indicates that there will likely be more money to provide armored and trained infantry, such as men-at-arms. Provides one unit of Men at Arms (Armored Foot, 18 figures), and 100 bezants.

Fish Ponds - The lands of the Lord of the Manor are all his, including all wild produce (salmon from the rivers, deer from the forests, and so forth). In order to increase the amount of fish that a Manor produces, fish ponds would be instituted. Again, this represents a wealthy and vibrant Manor, which would attract scutage from wealthy families aligning themselves with the Lord - such families would produce heavy cavalry, if not knights, so are represented as mounted Men at Arms. Provides one unit of mounted Men at Arms (Heavy Horse, 9 figures), and 100 bezants.

Church -A Manor would typically have several churches on it. This would include at least one Chapel in the castle and perhaps a small church in each of the peasant villages, towns, and ports. But when this result is indicated, it means that there is a higher status Church on the lands of the Manor. These lands, while included within the demesne of the Manor, are actually independent. However, they might have the Knights of a devoted and powerful patron on call for feudal duty, or there might be a chapter house associated with the Church from a religious order of Knights (such as the Templars). The presence of a Church, therefore, allocates to the Lord of the Manor the use of a unit of Holy Order Knights. Provides one unit of Religious Order Knights (heavy horse, 9 figures, lance - treat as Religious Order), but only if Church is paid 100 bezants.

Money raised from Lands in the Demesne can be used to purchase extra equipment, to hire mercenaries, to pay for Scouts or Spies, to fund Adventures, and of course to tithe to the Church, in order to secure the services of Holy Order Knights. Details on these will be in a future article.
A sample army, for Medieval Poppenheim, is detailed here.
A sample army, for Medieval Bombastia, is detailed here.
reade more...
The Player represents the Lord of a Manor, which owns a Demesne. At the center, of course, is his Manor, or Castle. This provides two military units, A unit of Crossbows (light infantry, 18 figures, crossbow), and a unit of Knights (heavy horse, 9 figures, with lance).

So, if we go with this chart for the random determination of lands:
2 - Vineyard
3 - Port
4 - Town
5 - Freeland
6 - Forest
7 - Farm
8 - Pasture
9 - Church
10 - Highlands
11 - Fish Ponds
12 - Orchards
Then the next step is to determine what a Lord will receive for his feudal escheats from each of those types of land.
Vineyard - Lands with grape vines, plus wine presses, cellars, and a local population of workers to draw from. The wine is a valuable trade item, so this land produces not only feudal soldiers (heavy infantry) but also money, from the wine trade. Provides a unit of Spearmen (heavy infantry, 18 figures), and 100 bezants.

Port - This land is along a navigable river, and a trading town has been built up at the spot of a natural mooring spot on the river. Some money is produced from the trade port, but more importantly, the ability to hire foreign mercenaries is possible, due to the amount of seagoing traffic that comes through here. Provides 200 bezants. May hire foreign mercenaries.

Town - A sizeable independent town has grown up here, meaning that it supports not only a sizeable market (large enough to service the town, but also the surrounding lands and villages), but also a church, guildhalls, mills and other urban services. The feudal obligation of the town is met through providing troops drawn from the town population, and the marketplace generates a regular flow of tax money. Provides a unit of Billmen (heavy infantry, 18 figures, polearms), and 100 bezants.

Farm - This is not just a single farm, but farmland representing multiple hides worth of feudal farms and subtenants. The feudal obligation of all these farms and villages is met in the form of heavy infantry, but also the natural horsemanship of the population means that some mounted soldiers can be classed as sergeants. Provides either Spearmen (heavy infantry, 18 figures), or Sergeants (medium horse, 9 figures).

Forest - Representing the waste of the demesne, the woodlands provide the serfs with the means of producing charcoal, harvesting firewood, and hunting for small game. Of course, there are enough villeins and scoundrels lurking along forest roads that a ready supply of archers can be conscripted. Depending on the area around the forest, it is also possible that some mounted archers can be found, and could be formed into units of hobilars. Provides either Archers (light infantry, 12 figures, longbow), or Hobilars (medium horse, 9 figures, bow).

Pasture - This represents closed lands for the Lord's private flocks of animals. Open land is found in the farm lands for the serfs to graze their own animals, this is representing husbandry of animals on a large scale. Local villages supporting the economy of shepherds and drovers will produce feudal troops suitable for light cavalry duty, or as slingers. There is also some money to be made from the wool trade. Provides either Slingers (light infantry, 12 figures, sling), or Riders (light horse, 9 figures), and 100 bezants.

Highlands - These lands are in hills and mountains with terrain typically too rough for large scale farming or grazing. The locals are rough independent clans and tribes, that owe fealty but may not provide much for the manor other than occasional military service. The troops are irregular bands that are useful for scouting and skirmishing, best described as light infantry or mounted raiders. Provides Highland Infantry (light infantry, 18 figures, Pike; or 12 figures, Bow), or Reivers (medium horse, 9 figures, lance).

Orchards - Lands given over to long term agricultural produce, such as fruit and nut trees. Typically such lands are a sign of a successful Manor, and so the presence indicates that there will likely be more money to provide armored and trained infantry, such as men-at-arms. Provides one unit of Men at Arms (Armored Foot, 18 figures), and 100 bezants.

Fish Ponds - The lands of the Lord of the Manor are all his, including all wild produce (salmon from the rivers, deer from the forests, and so forth). In order to increase the amount of fish that a Manor produces, fish ponds would be instituted. Again, this represents a wealthy and vibrant Manor, which would attract scutage from wealthy families aligning themselves with the Lord - such families would produce heavy cavalry, if not knights, so are represented as mounted Men at Arms. Provides one unit of mounted Men at Arms (Heavy Horse, 9 figures), and 100 bezants.

Church -A Manor would typically have several churches on it. This would include at least one Chapel in the castle and perhaps a small church in each of the peasant villages, towns, and ports. But when this result is indicated, it means that there is a higher status Church on the lands of the Manor. These lands, while included within the demesne of the Manor, are actually independent. However, they might have the Knights of a devoted and powerful patron on call for feudal duty, or there might be a chapter house associated with the Church from a religious order of Knights (such as the Templars). The presence of a Church, therefore, allocates to the Lord of the Manor the use of a unit of Holy Order Knights. Provides one unit of Religious Order Knights (heavy horse, 9 figures, lance - treat as Religious Order), but only if Church is paid 100 bezants.

Money raised from Lands in the Demesne can be used to purchase extra equipment, to hire mercenaries, to pay for Scouts or Spies, to fund Adventures, and of course to tithe to the Church, in order to secure the services of Holy Order Knights. Details on these will be in a future article.
A sample army, for Medieval Poppenheim, is detailed here.
A sample army, for Medieval Bombastia, is detailed here.


